How to make basic trunk hosen             page   1   2   3  4   5

     Trunk hosen, slops or "pumpkin pants"  are a "must" for any man wishing to do a later period persona. The challenge lies in making the trunk hosen serviceable as well as attractive. 
    This section will attempt to describe how to make a basic pair. I have taken period example, added a few ideas of my own in the creation of this pattern. I have tried to be as delicate and modest as possible in my descriptions. The section is written for the stitcher with some experience.
     The fabric requirements will greatly depend on the size of the person that the trunk hosen are being made. Hopefully, calculations can be made from making the pattern.
     I make my trunk hosen in two layers. Usually the top layer will contrast with the lining layer. Trim and pearl can be added on the strips depending on taste. 
     Although I give permission for people to use these patterns and instructions for personal use, I do claim copyright on all the patterns and instructions.
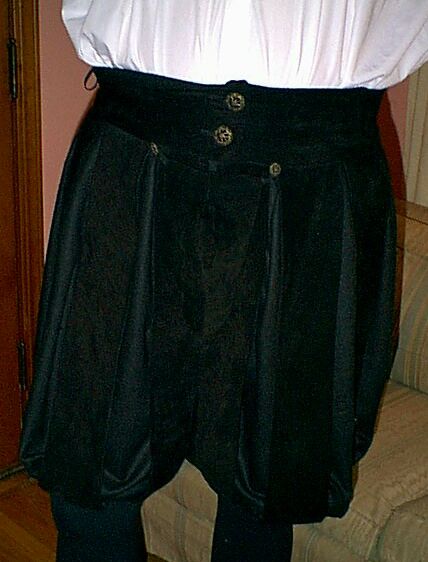
Front view

I apologize for the black on black photos. This was the only pair I had on hand when putting this section together 

Preparing everything
 
First we need to make a pattern to fit the gentleman. 
The measurements needed:
Waist (at belt)
Hip to desired length of trunk hosen
Thigh (at the point of the desired length
Crotch loop (this is measured by placing the measuring tape on the belly button and looping it between the leg to the center of the waist in the back. Have the person adjust the length as preferred to avoid "wedgies")

We are now ready to make our pattern and cut into the fabric.  We must now determine how many strips we are going to have and what the length shall be. I have seen the strips in all lengths and width. If you plan to use trim on the strips, keep in mind the amount of trim you will need in relation to the number of strips. I will give my instructions as I would be making a pair for my husband and will use the black suede outfit as my example.


Example 1

The most difficult pieces to cut are the front and back centers. The image above has the steps to make the pattern. First draw a line the length of the strips (I made Brad's 22 inches). Then draw a line for the width (I used 3 inches). Figure 3 and 4 are the steps to draw the loop. Take the measurement and divide in by half. That will be the length of the loop on the pattern. The measurement I was working with was 17 inches. I drew a straight line 15 inches down then 2 inches across. The corner was then rounded. Remember to allow for seams.

A dressmaker's curve can be extremely useful in making the pattern.             (continue to page 2)